Start with the video:
Via Hanseatica trip planner is easy-to-use online travel planner tool, that lets you find and add points of interest, dining places and hotels.
- Search and display objects on a map, based on specific keywords or POI categories.
- Trip planner will help you plan both time spent on spots and total travel time.
- Your trip can be saved and shared.
How to use Trip planner:
1. Mark the beginning and trip destination.

In this example, trip is set to start in Tallinn and end in Valmiera, Latvia. You are welcome to add departure time, as it will be handy for calculated time at the destination.
2. Application will map the trip and show trip timeline
- The travel planner will appoint automatically two eating places per day and in case on multiple day trips also an accommodation place. All objects can be changed later.
- Lunch will be appointed to location that is on the road between 12:00-15:00, dinner 18:00-21:00 and accommodation starting from 20:00.
- If eating and accommodation places will be reached outside the above-mentioned timeframes, the arrival time will be presented in red color, if all is within abovementioned timeframes, then in green color. The arrival time to automatically added eating and accommodation places are initially mainly in red, as no additional stops are selected yet. If new stops are added, they are eventually moving to recommended timeframe and arrival times turn green.
3. Choose points of interest.
- For choosing points of interest, click on them and press “ADD TO TRIP”.
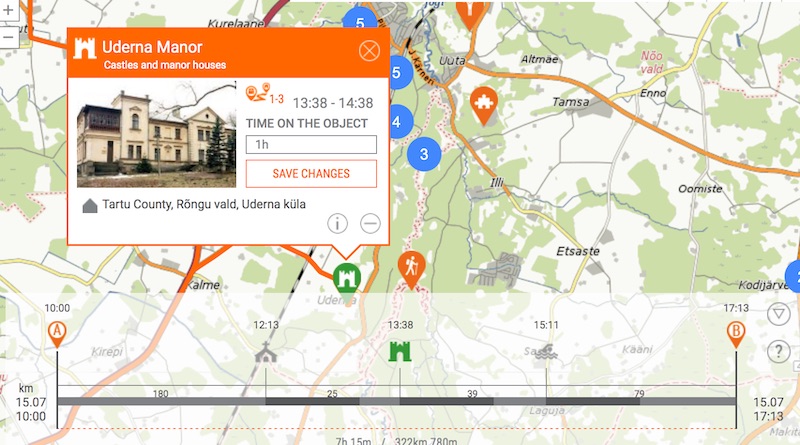
In this example, a POI, Uderna Manor is added to trip. It is estimated to spend one hour at the manor. - Marked objects will be added to the trip and the route will be refreshed both on the map and timeline.
- The order of visiting points of interest can be changed in the list of objects on the side panel, by holding down the left side icon with arrows and dragging it to needed place.
- Time of stay at a point of interest can be changed in the information window of an object in the field “TIME ON THE OBJECT”.
- In addition to objects presented by the database, planner allows to include to the trip any location on the map. For adding this, click on any place on the map and push icon “+” on viewed information window. By clicking again on the object added to the trip you can change its name (initially it is named after the address).
- To remove objects click on icon “-” either on object information window or on objects’ list provided on the left side of the screen.
4. View objects and detail info of your trip.
- Information on objects viewed on the map can be seen in information window, which will open after clicking on object icon.
- To open detail information of selected object push icon “i” either on object information window or on objects’ list provided on the left side of the screen.
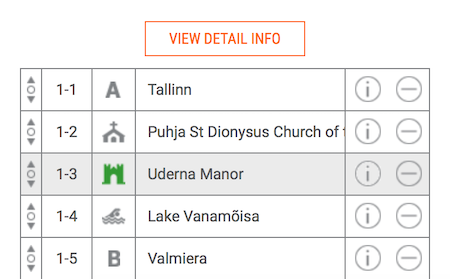
- Detailed trip info opens after clicking on “VIEW DETAIL INFO”. By default you will see full information on objects including photos, contacts and descriptions. By clicking “HIDE DETAIL INFO” you can see summary list of objects, stops and driving time.
5. Save the trip
- After you have created suitable trip, click “GENERATE CODE” and your own route is ready.
- In order not to forget your trip code, click to share icon and send it by e-mail either to yourself or to your friend.
- To view your previously created trip, enter your trip code in the field “My trip code” and click “SHOW”.
- The same code can be used to open your trip in Via Hanseatica mobile application.
6. ROUTES
- Predefined routes can be taken as a basis for creating your own trip by modifying it. For doing it select a suitable route, click “CHANGE THE ROUTE” and start making your changes.
- After you have created a suitable route, click “GENERATE CODE”.